

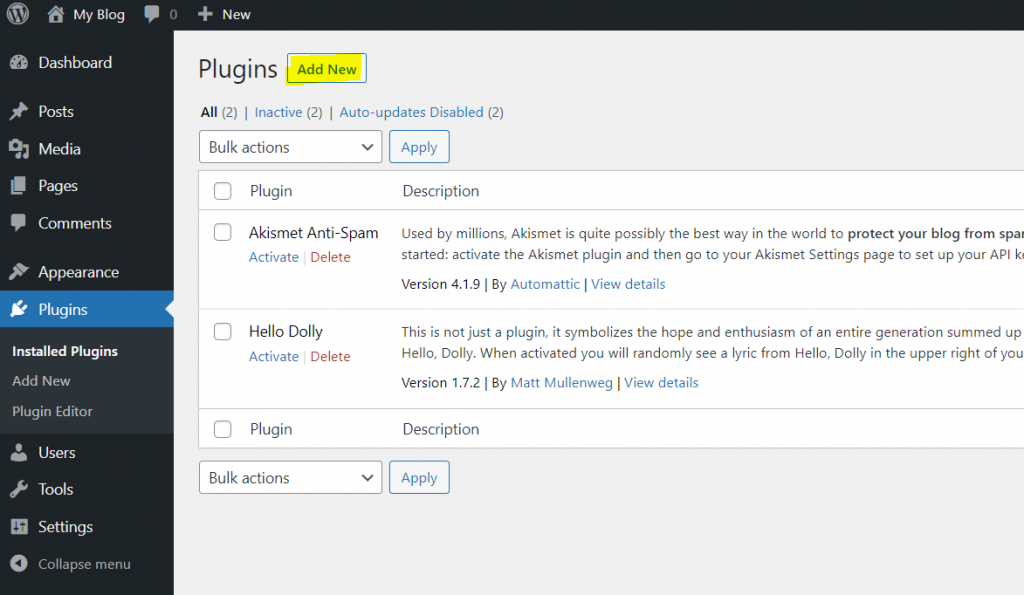
To configure SMTP server in WordPress, you may follow the below steps:
- Login to your WordPress
- Click “Plugin” Then click “Add New”.
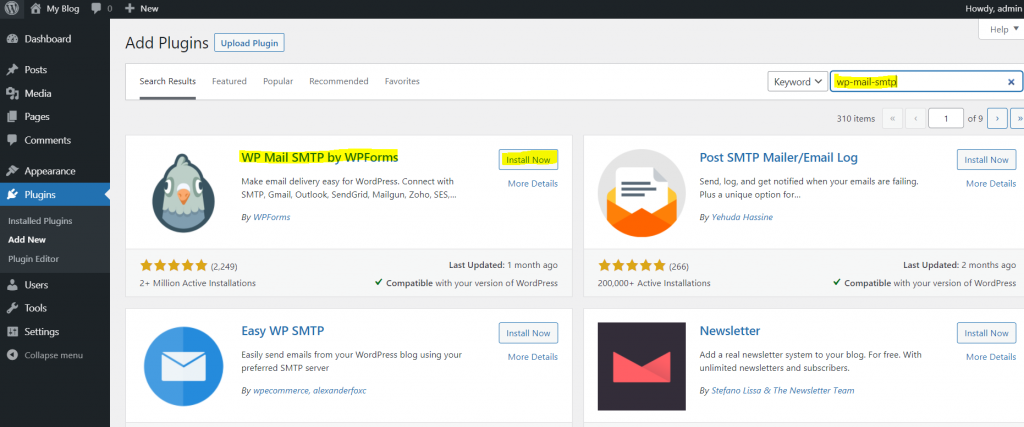
- Then, search “wp-mail-smtp” and enter.
- You will find “WP Mail SMTP by WPForms” and then click “Install Now”
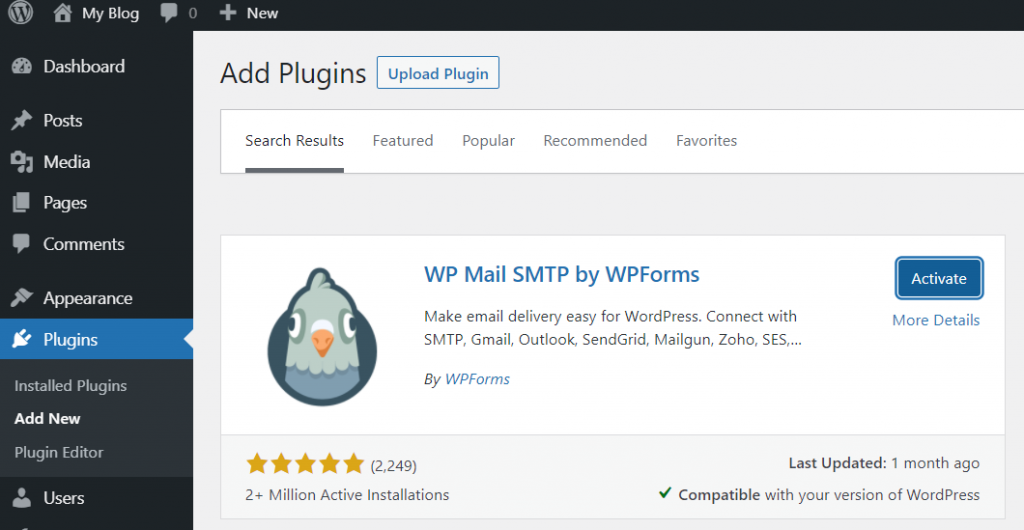
- After Installation, Click on “Activate”
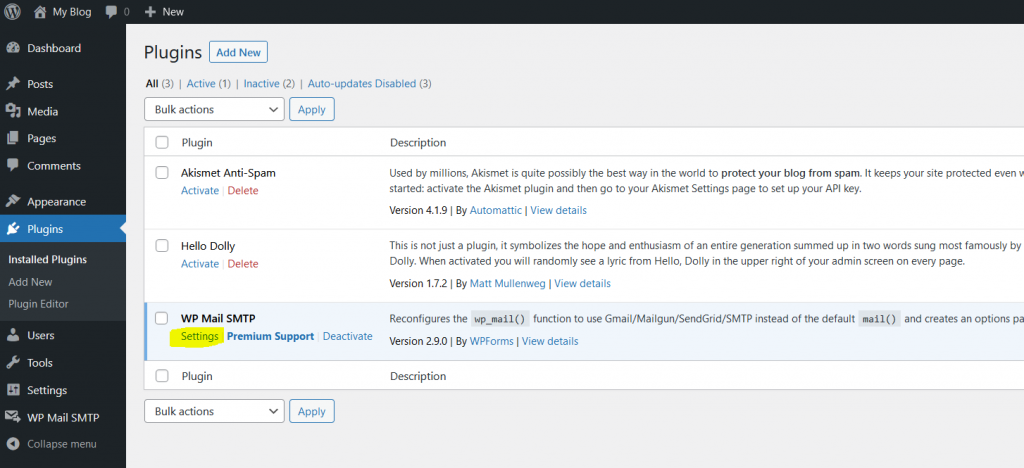
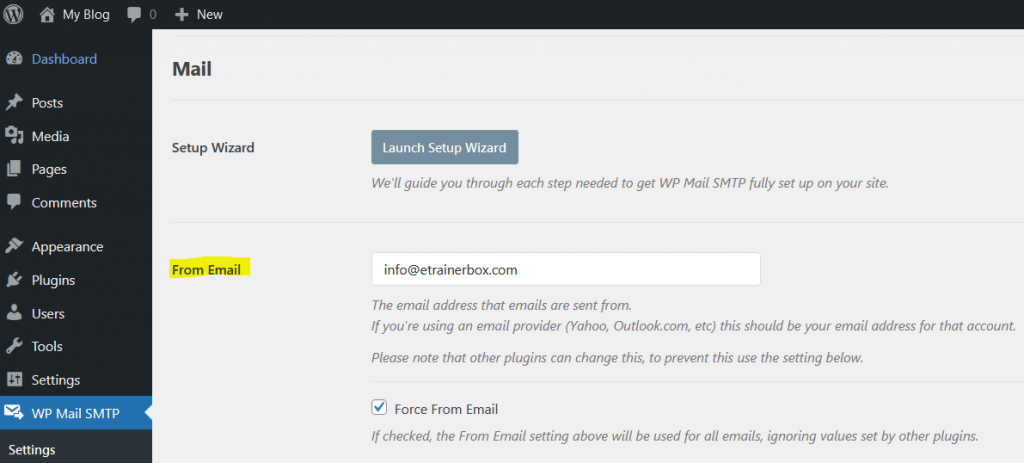
- Click on “Settings”
- Write your email in “From email” Section:
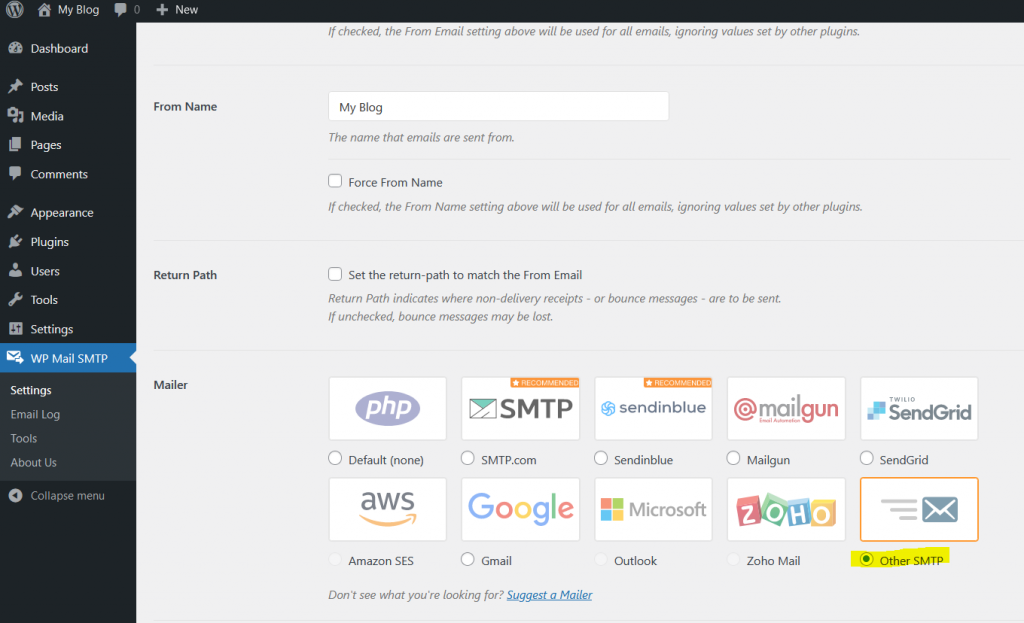
- Select “Other SMTP” option from Mailer
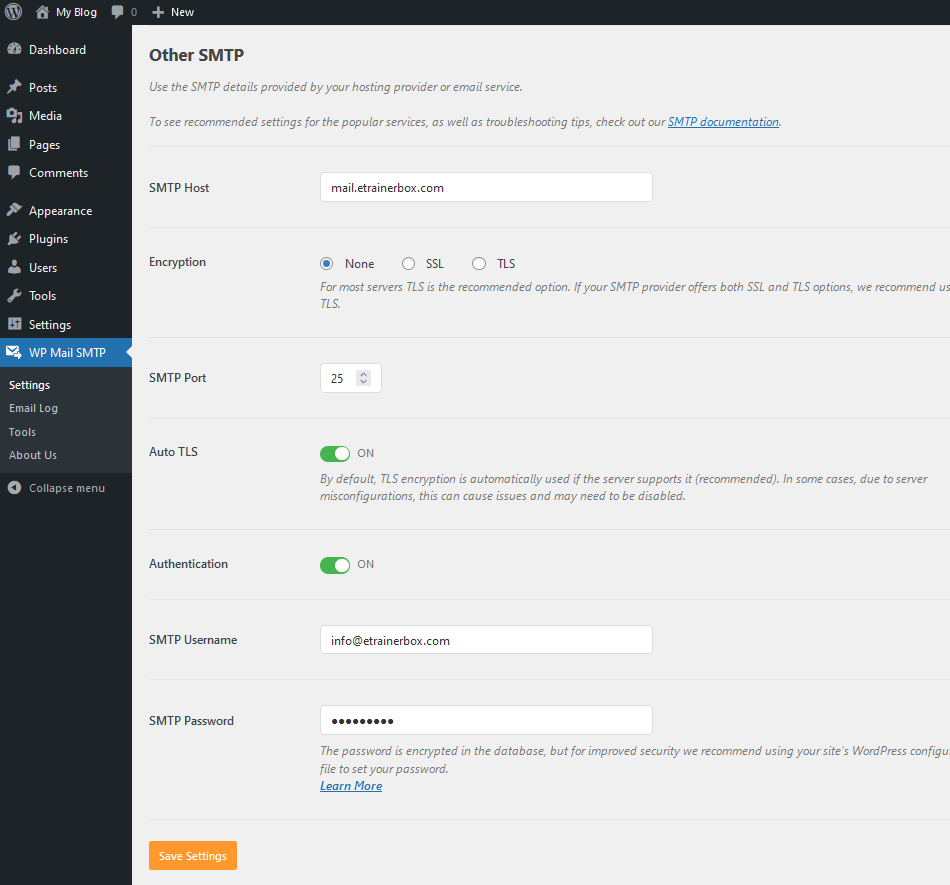
- In SMTP Host, You will write “mail.yourdomainname.com”, here my domain name is etrainerbox.com, So, I will use SMTP host “mail.etrainerbox.com”.
- In Encryption, select “None”
- In SMTP Port, Use 25.
- Auto TLS “ON”.
- Authentication “ON”
- SMTP User Name & Password: here, you will write your email address, for example, I will use “info@etrainerbox.com” and use the same email Password in SMTP Password.
- Then, Click on “Save Settings”
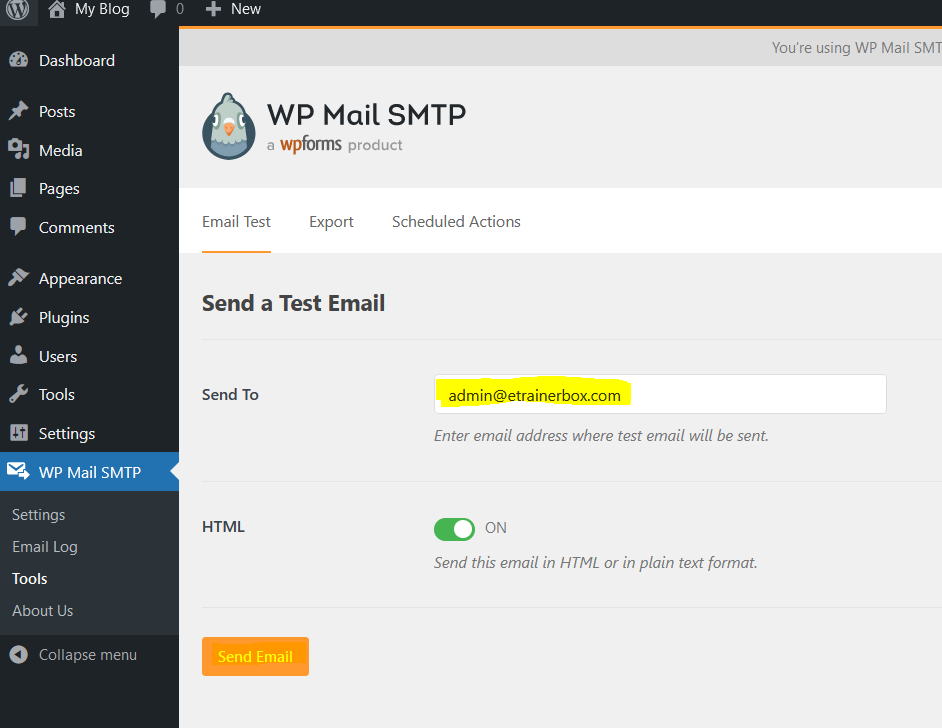
- Now, Click on “Email Test” Tab.
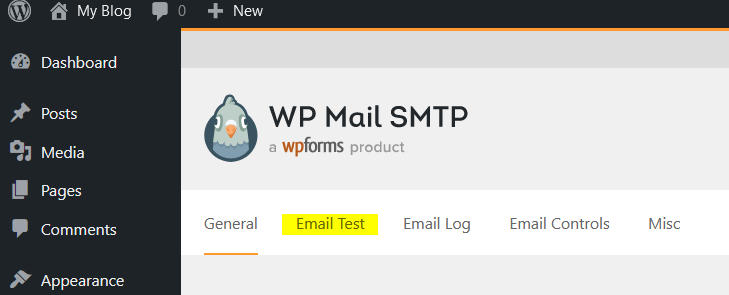
- Here, write your email address, which you want to use for the test email.
- Then, click on “Send email”.
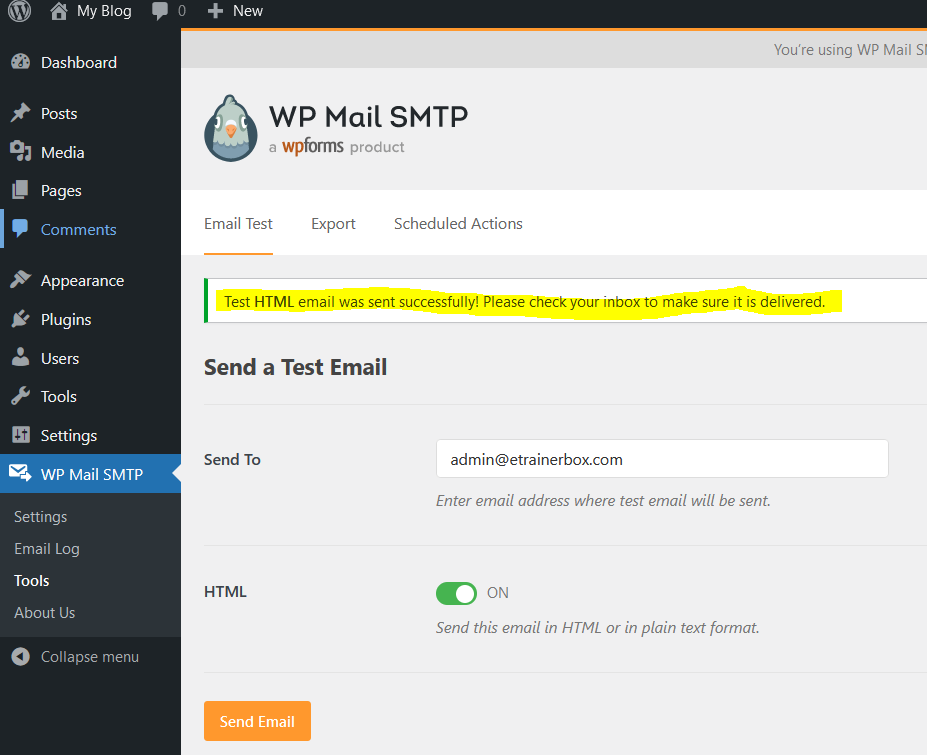
You will see the message “Test HTML email was sent successfully! Please check your inbox to make sure it is delivered.”
In this way, you can setup SMTP mail.


